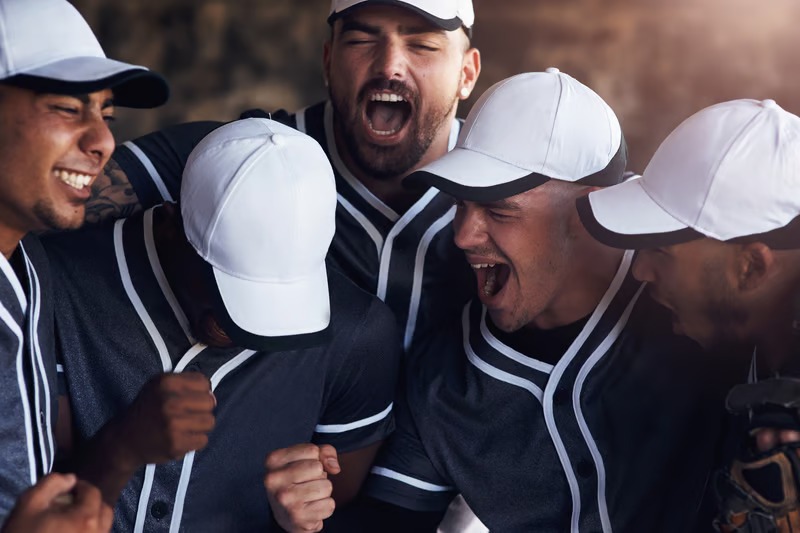
Some hats are just hats. Then there are the ones that are not. The one you wore through a championship season. The one that survived three road trips and twice as many heartbreaks. The one with the faded logo and the sweat line along the brim that proves exactly how many hours you spent wearing it. Team hats carry something that regular clothing does not, and that weight makes it hurt in a specific way when you pull one out of the wrong wash cycle looking like something a dog found in a ditch. The shape is gone. The brim is warped. The crown has collapsed into something unrecognizable. And the worst part is that it was completely avoidable. Knowing how to clean team hats properly is not complicated knowledge, but it is specific knowledge, and most people never get it until after the damage is already done. This guide gives you everything you need before that moment arrives or helps you recover if it already has.
The Real Reason Team Hats Are So Easy to Ruin
Most people treat hats like any other item of clothing. They figure a wash cycle is a wash cycle. But a team hat is not built the way a shirt or a pair of socks is built. It is a three-dimensional structure made from multiple different materials that all respond to heat, water, and agitation in completely different ways. The outer crown panels are typically woven or knit fabric. The brim contains a stiffening insert that is either cardboard in older hats or plastic in most modern ones. The sweatband on the interior is usually a different material altogether, often a cotton terry or synthetic blend that absorbs moisture and holds it differently than the crown fabric. The logo on the front may be embroidered with thread that has its own response to heat and friction, or it may be a heat-transferred print that can crack, peel, or separate under the wrong conditions. When all of these different materials hit a hot washing machine at the same time, they do not fail uniformly. Each one does something different. The crown fabric shrinks or twists. The brim insert warps if it is plastic or dissolves if it is cardboard. The sweatband shrinks at a rate that pulls the entire structure into a shape it was never designed to hold. The embroidery may survive or it may pucker and pull away from the base fabric. The result is a hat that technically still exists but no longer does what a hat is supposed to do, and more importantly, no longer looks or feels like the hat you put in the wash. Understanding this structural complexity is the single most important foundation for learning how to clean team hats without ruining them. Once you understand what you are actually dealing with, every cleaning decision becomes easier to make correctly.
Knowing What Your Hat Is Made Of Before You Touch It
Reading Labels and Identifying Fabric Types
The care label sewn into your hat’s sweatband is the first place to look before cleaning anything. Many people ignore care labels on clothing and get away with it because the tolerances on a t-shirt or a pair of jeans are fairly wide. The tolerances on a structured team hat are much narrower, and the care label often contains specific information about the hat’s materials and construction that changes which cleaning methods are safe. If the label says dry clean only, that recommendation exists for a reason, typically because the hat contains materials or construction elements that cannot safely be wet at all. If the label specifies cold water only, that means even warm water carries shrinkage risk for that particular material combination. Wool is the most common reason for restrictive care labels on team hats. It is used in many premium fitted hats and vintage-style caps because of its natural texture and warmth, but wool fibers have a unique protein structure that causes them to felt and shrink dramatically when exposed to heat and mechanical agitation. A wool team hat washed in warm water with any significant agitation can emerge several sizes smaller than it went in, with a dense, matted texture that is permanent and irreversible. Cotton hats are more forgiving than wool but still susceptible to shrinkage with hot water and to color fading with harsh or bleach-containing detergents. Polyester and acrylic hats are the most tolerant of moisture and mild agitation but are not immune to brim distortion or embroidery damage. Blended fabrics combine properties of their component fibers, and they generally behave more like their synthetic component in terms of washing tolerance while retaining some of the natural fiber’s sensitivity to heat.
Checking Your Brim Before Any Water Touches It
Brim assessment deserves its own attention because the brim is where the most irreversible damage happens during hat cleaning and where the most preventable mistakes are made. The brim’s shape is maintained by an internal insert that sits between the outer fabric layer and the fabric lining on the underside, and identifying what that insert is made of takes thirty seconds and can save your hat from permanent disfigurement. Press gently on the center of the brim with your thumb and forefinger. A cardboard insert will feel rigid but slightly responsive to pressure, and in older hats you may hear a faint crackling sound when you press. A plastic insert feels springy and returns immediately to its original position when released. You can also try very gently bending the tip of the brim and feeling for the flexibility characteristic of plastic versus the slight resistance and cracking tendency of old cardboard. Cardboard brim inserts are almost exclusively found in hats manufactured before approximately the mid-1990s. If your team hat is vintage or was purchased secondhand and you cannot verify its age, treat the brim as if it contains cardboard and use only surface cleaning methods that avoid submerging the brim entirely. Water contact with a cardboard brim insert, even brief submersion, will cause the cardboard to absorb moisture, soften, lose its rigidity, and dry in a warped position that cannot be corrected without replacing the entire brim structure. This is not recoverable at home. Modern hats with plastic brim inserts can tolerate water contact without this catastrophic outcome, though sustained heat can still cause plastic brim inserts to warp, which is why even modern hats should never be machine dried or placed in direct sunlight during drying.
Spot Cleaning for Everyday Maintenance
Spot cleaning is not a lesser form of hat cleaning. For many hats and many types of soiling, it is the correct and complete cleaning response, and treating it as merely a stopgap before a full wash misses its genuine value. The purpose of spot cleaning is to address specific soiled areas with targeted moisture and cleaning solution, avoiding the need to wet the entire hat and expose its full structure to the distortion risk that comes with thorough saturation. Sweat deposits along the interior sweatband are the most common problem that team hat owners need to address, and they respond very well to spot treatment. Mix a small amount of mild dish soap with cold water and apply the solution to the stained sweatband using a clean soft-bristled toothbrush. Work the solution gently into the fabric using small circular motions rather than scrubbing back and forth, which can abrade fabric fibers and push the stain deeper rather than lifting it. After working the solution in, remove it by pressing a clean damp cloth against the treated area and lifting rather than wiping, which prevents the stain from spreading into adjacent clean fabric. Repeat with a cloth dampened with plain cold water to remove any soap residue, then press with a dry cloth to absorb as much moisture as possible and allow the hat to air dry completely before wearing. For exterior stains on the crown panels, the same basic approach applies, with the additional consideration that you should always work from the outer edge of the stain toward the center to prevent the moisture from spreading the stain outward into the clean surrounding fabric. A small amount of baking soda paste, made by mixing baking soda with just enough cold water to create a spreadable consistency, is particularly effective for grease-based stains like sunscreen or hair product residue on the outer fabric.
Hand Washing: The Right Way to Do a Full Clean
When a team hat needs more than spot treatment can provide, hand washing in cold water is the method that offers the best combination of cleaning effectiveness and structural safety for most modern hat constructions. The preparation matters as much as the washing itself. Fill a clean sink or basin with cold water. The water must be cold, not cool, not lukewarm, and absolutely not warm. Temperature is the most critical variable in hat washing and the one most often compromised by people who assume warmer water means cleaner results. Add approximately one teaspoon of a mild laundry detergent, or a dedicated hat cleaning solution if you have one available. Avoid any detergent that contains bleach, optical brighteners, or fabric softener components. Bleach and optical brighteners can strip color from hat fabrics in ways that are subtle at first and cumulative over multiple washes. Fabric softener can leave a residue that changes the drape and texture of hat fabric and attracts dirt more quickly than clean fabric does. Before submerging the hat, apply a small amount of the cleaning solution directly to any particularly soiled areas, particularly the sweatband and any visible stain spots on the crown, and allow it to pre-treat for five to ten minutes. Then submerge the hat in the solution and use your fingers and a soft brush to gently work the cleaning solution through the fabric, paying close attention to the sweatband interior, the area where the crown panels meet the brim, and any exterior soiling on the panels. The motion should always be gentle. Rubbing, scrubbing, twisting, or wringing the hat during washing creates the kind of mechanical stress that distorts fabric and stresses seams, so every motion should be careful and controlled.
The Part Nobody Talks About: Rinsing Properly
Rinsing is one of the most underemphasized steps in the entire process of how to clean team hats, and inadequate rinsing creates problems that people typically blame on other parts of the cleaning process. Soap residue left in hat fabric after washing does several things that progressively damage the hat. It makes the fabric feel stiff and slightly scratchy against the head. It creates a slightly sticky surface at the microscopic level that attracts and holds dirt particles more effectively than clean fabric, meaning the hat gets visibly dirty faster after every wash. And in some fabric types, particularly natural fibers like cotton and wool, soap residue can contribute to fiber degradation over time, weakening the fabric and reducing the hat’s useful life. Rinse the hat by either holding it under a gentle stream of cold running water, directing the water through the fabric rather than forcing it against the structure of the hat, or by draining the soapy water from the basin and refilling it with fresh cold water for two or three soak-and-agitate cycles until the water runs completely clear and no soap is visible. During rinsing, gently press the water through the fabric rather than wringing or twisting. After rinsing, press the hat gently between two clean dry towels to absorb as much surface water as possible without applying the twisting force that causes distortion, then move directly to the drying phase while the hat is still holding its general shape.
Drying Without Losing the Shape You Just Saved
Choosing and Setting Up Shape Support
Drying is where hats are most commonly ruined after the wash itself, and the reason is almost always inadequate shape support during the drying period. The principle is simple. Wet fabric sets into whatever shape it dries in. If a wet hat crown is unsupported during drying, the panels will collapse inward under the weight of residual moisture and the hat will dry in a compressed, deflated shape that may be permanent or very difficult to correct. Preventing this requires that the hat hold its correct three-dimensional shape continuously from the moment washing ends until the hat is completely dry, including the interior layers that retain moisture longer than the outer fabric. The most effective shape support options for home hat drying are a dedicated hat form, which can be purchased inexpensively online and is the most reliable option for collectors or frequent hat washers, a balloon inflated to approximately the circumference of the hat’s interior and tied securely, which provides surprisingly good shape support and allows adjustment by inflation level, or a head-shaped mold made by stuffing the crown firmly with white tissue paper or clean white towels, which provides solid support without the color transfer risk of colored materials. Do not use newspaper to stuff the crown during drying. The ink in newsprint transfers readily to wet fabric and can leave permanent staining on the interior, and sometimes the exterior, of a team hat. Once the shape support is in place, set the hat in a location with good ambient air circulation, away from direct sunlight, away from heating vents, and away from any heat source. The drying environment should be room temperature and as dry as possible to accelerate evaporative drying without heat.
How Long Drying Actually Takes and Why Rushing Destroys Hats
The drying time for a hand-washed team hat is longer than most people expect and longer than most people wait before declaring the hat dry enough to wear. Outer fabric surfaces can feel dry to the touch within a few hours while the interior fabric layers, particularly the multiple layers of fabric that construct the brim and the sweatband area, remain significantly damp. Wearing a hat that is externally dry but internally damp allows the residual moisture in the interior layers to set the hat into whatever shape your head imposes during wear, which may or may not be the shape the hat was originally designed to hold. Depending on ambient humidity and air circulation, a properly washed team hat typically requires between twelve and twenty-four hours to reach true complete dryness throughout all layers. The test for complete dryness is pressing firmly on the brim and the crown from multiple angles and feeling for any coolness or slight resistance that indicates retained moisture. A completely dry hat will feel consistent in texture and temperature throughout its entire structure. Resist every impulse to accelerate drying with a hair dryer, a clothes dryer on a low setting, placement in sunlight, or proximity to a heating source. Each of these introduces heat that creates shrinkage risk in the fabric and warping risk in brim insert, regardless of how gently the heat is applied or how short the exposure is.
Machine Washing: The Honest Assessment
The question of whether machine washing is ever acceptable for team hats is one that generates confident and contradictory opinions across hat care communities, and the honest answer is more nuanced than either camp typically acknowledges. Machine washing is potentially acceptable for a specific and limited subset of team hats under carefully controlled conditions, and it is definitively not acceptable for another specific subset, and knowing which category your hat falls into requires the fabric and brim identification work described earlier in this guide. Hats that meet the following criteria are candidates for careful machine washing: the brim insert is confirmed plastic and not cardboard, the fabric is primarily synthetic, meaning polyester or acrylic dominant rather than wool or high-quality cotton, the hat has no applied patches, fragile embellishments, or complex construction details that could be damaged by agitation, and the hat is a current production model rather than vintage or collectible. For hats that meet all of these criteria, machine washing is possible using a mesh delicates laundry bag to reduce agitation exposure, the most gentle available cycle on the machine, cold water only with a small amount of mild detergent and no bleach, and an immediate transfer to supported air drying directly after the cycle with no dryer time at all. For any hat outside this specific category, hand washing or spot cleaning is the only safe approach, and machine washing carries a meaningful risk of irreversible damage that no amount of careful cycle selection will fully eliminate.
Final Thought
A team hat is one of the few pieces of sports merchandise that genuinely improves with age when it is cared for properly. The slight fading that comes from seasons of sun, the soft drape of fabric that has been broken in gradually, the way a well-maintained brim holds its curve exactly the way it did the first day it was worn: none of that happens with a hat that has been wrecked by a careless wash and replaced. Knowing how to clean team hats properly is really about understanding what you have and caring for it accordingly. Cold water. Gentle hands. Real drying time with proper support. These are not difficult techniques. They are just careful ones. And the hats worth keeping are worth being careful about.